Instructions
Download this document and answer the questions in it. Then, upload your answers to Box.
Remember to anonymize your submission. Your file name should contain only your Participant ID Number and the section number. For example, if your Participant ID Number is 103, your file name should be “SFD22_P103.docx.” Note that “SFD” stands for “Solar Farm Design.” Section 2.2 is abbreviated as 22. “P” stands for “Participant.”
Click here to return to Section 2.2 in the textbook.
Click here for Aladdin Reference Slides.
Practice Example: Solar Farm Design
Organize Your Designs with Projects
You can create, view, and compare multiple designs within a single project. A project template has already been provided for you, which contains many identical copies of the Pickle solar farm design template. To create your PD designs, simply open one of the design templates in the project; you don’t have to start from scratch.
● Open this Aladdin PD project template. Make sure you are signed in to an account. Select Main menu> Project> Save project as 
- Double click on a design in a project to open the design

● Your design is open when you see a cloud put on the project panel
As a refresher, here are the three solar farm design variables you can change:
| Property | Explanation | Example |
| Tilt angle | How the solar panel is oriented in the vertical direction. An appropriate tilt angle orients a solar panel towards the Sun. | 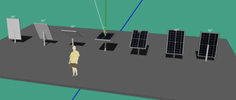 |
| Solar panel row width (RW) | Each row of solar panels may have multiple sub-rows. A wider row casts a longer shadow. |  |
| Inter-row spacing (IRS) | The distance between every two rows of solar panels (center-to-center). If two rows of solar panels are too close together, some panels may be shaded and produce less output. | 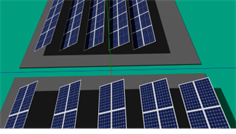 |
In traditional design, the designer was required to manually add solar panels and change their position and size to create the desired design. In parametric design, you can simply enter the values for each design variable, and a layout wizard will generate the corresponding design for you.
Steps:
A. Open your own copy of the PD project and
double click on the first design.
B. Make sure to clear any existing solar panels. Otherwise, the layout wizard will not be able to place new solar panels.
C. To open the layout wizard, right click on the
shaded area below the solar farm and select
“Layout > Solar Panel Array Layout”. (If you’re not seeing the “Layout” option, make sure that the “Lock” option is not checked.)
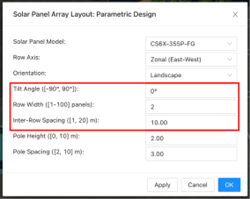
D. Change the three design variables to the desired
values and click “OK”.
E. The layout wizard will ask you if you want to replace existing solar panels. Click “Yes”.
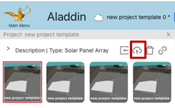
F. Update the selected design ![]() to save your first PD design.
to save your first PD design.
One of the powers of parametric design is to explore the design space much more efficiently. For example, what is the best IRS, if we decide to use RW=3? After a trying a few different values, we may discover that:


● IRS=6.4 (left): There is too much space between the solar panels.
● IRS=3.2 (right): The inter-row shading decreases the output of each solar panel.
● IRS=4.8 (middle): This layout is more balanced.
3. Use parametric design to create the example above (tilt = 15º, RW = 3, IRS = 4.8m) in your PD project.
4. Now Now that you have your first PD design, create two more solar farm designs by yourself and update them ![]() in your PD design project.
in your PD design project.
- One design with thinner rows (RW=2)
- One design with wider rows (RW=5)
Find the best IRS for these two designs by trying as many IRS value you like. [Additional tips: Keep the same tilt angle (we recommend 15 degrees for this task), so you can compare the different IRS.] Use the shadow and heatmap visualization ![]() to estimate the “sweet spot.”
to estimate the “sweet spot.”
| What is the best IRS for RW=2? | |
| What is the best IRS for RW=5? |
